星尘代理
StarAgent部署在每台应用服务器,或桌面系统,或边缘网关。作为系统服务,通过配置拉起并守护业务应用进程,同时用于收集监控各服务器性能,支持Windows/Linux/macOS/IoT(包括各种国产系统)。
功能特点
- 自启动。自身注册为系统服务,随操作系统自动启动。
- 多系统。支持Windows、Linux、macOS、IoT边缘网关、OpenWRT以及各种国产操作系统。
- 性能监测。定时上报节点性能,包括CPU内存磁盘以及网络指标。
- 应用管理。读取配置文件,启动多个目标应用。
- 应用守护。监测应用进程,如有退出或内存超限则重新启动。
- 自动更新。根据节点版本配置策略,支持不同环境的版本升级。
- 运行时安装。星尘平台的节点框架,支持下发策略给代理,安装特定版本的dotNet运行时。
下载星尘代理
下载编译好的版本:
http://x.newlifex.com/star/staragent45.zip
http://x.newlifex.com/star/staragent31.zip
http://x.newlifex.com/star/staragent50.zip
http://x.newlifex.com/star/staragent60.zip
http://x.newlifex.com/star/staragent70.zip
http://x.newlifex.com/star/staragent80.zip
内含windows启动的StarAgent.exe,其它环境使用 dotnet StarAgent 启动。
也可以下载源码,编译StarAgent并得到net40/net45/netcore3.1/net50/net60/net70/net80多个输出,支持win-x64/linux-x64/linux-arm/linux-arm64,根据需要选用。
源码:https://github.com/NewLifeX/Stardust
国内:https://gitee.com/NewLifeX/Stardust
Windows安装
(前置条件是安装好.NET运行时,下面使用net8.0为例,其它版本相同)
下载压缩包http://x.newlifex.com/star/staragent80.zip,并解压缩到独立目录。
快速安装:管理员执行以下命令快速安装并指定服务端地址,若完成则跳过本章节后续标准流程。
StarAgent.exe -install -server http://star.newlifex.com:6600使用管理员权限(文件上点击右键选以管理员身份运行)启动StarAgent.exe,按下按键2即可把StarAgent安装为Windows服务,此时出现菜单3,用于启动服务。我们先不启动服务,还需要做一个配置。
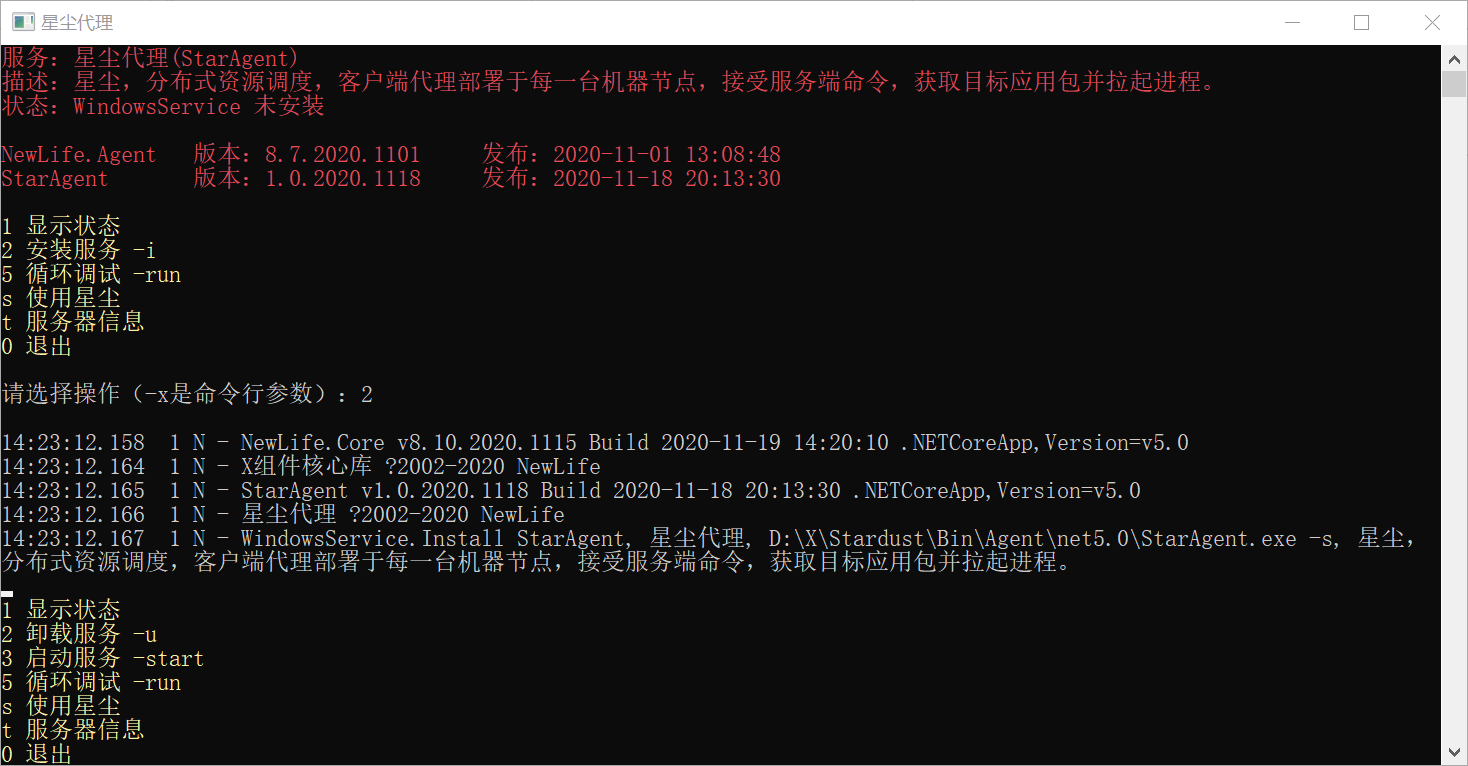
(文字有更新,而图片未更新,所以看起来有版本差异,不影响使用效果)
按键s,使用星尘,配置星尘服务端地址

这里我们输入星尘服务端地址:http://star.newlifex.com:6600,(什么都不填直接回车也是这个地址),使用者在这里输入自己部署的星尘服务端StarServer地址,默认是6600端口。
也可以不指定服务端,直接单机使用,用于管理本地应用自启动。
最后按键3,启动服务
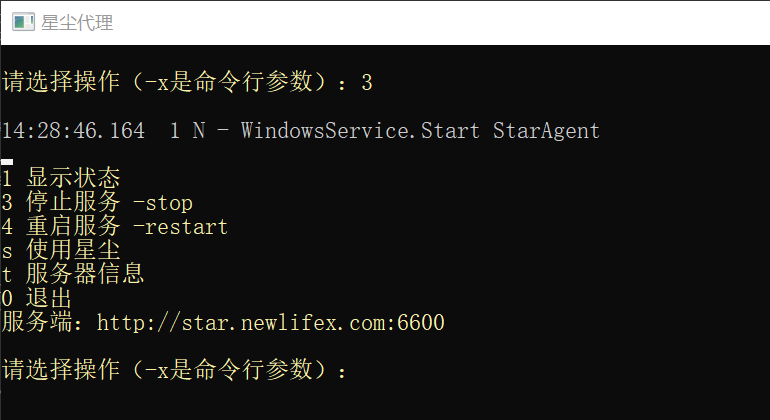
启动后按0退出控制台窗口。在该窗口退出之前,StarAgent实际上存在两个进程,一个是上面的控制台窗口,另一个是Windows服务进程。这里只需要退出控制台窗口即可。
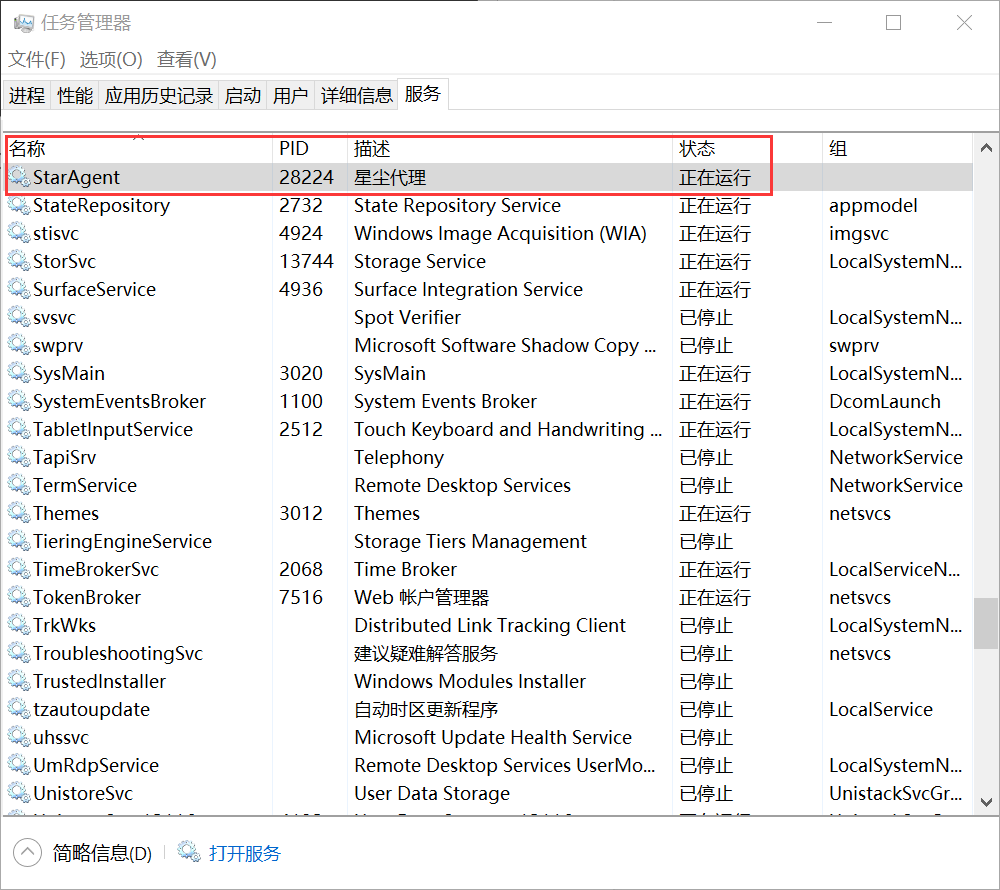
也可以在任务管理器的服务栏启动和停止服务,快速按下st,选择行定位到StarAgent,然后右键控制服务。
Linux安装
快速安装:管理员执行以下命令快速安装,若完成则跳过本章节后续标准流程。
curl http://x.newlifex.com/star/star.sh | sudo bash(前置条件是安装好.NET运行时,下面使用net8.0为例,其它版本相同)
Linux安装稍微复杂一点,下载压缩包 http://x.newlifex.com/star/staragent80.zip,并解压到独立目录
wget http://x.newlifex.com/star/staragent80.zip
mkdir agent
unzip staragent80.zip -d agent
cd agent
chmod +x StarAgent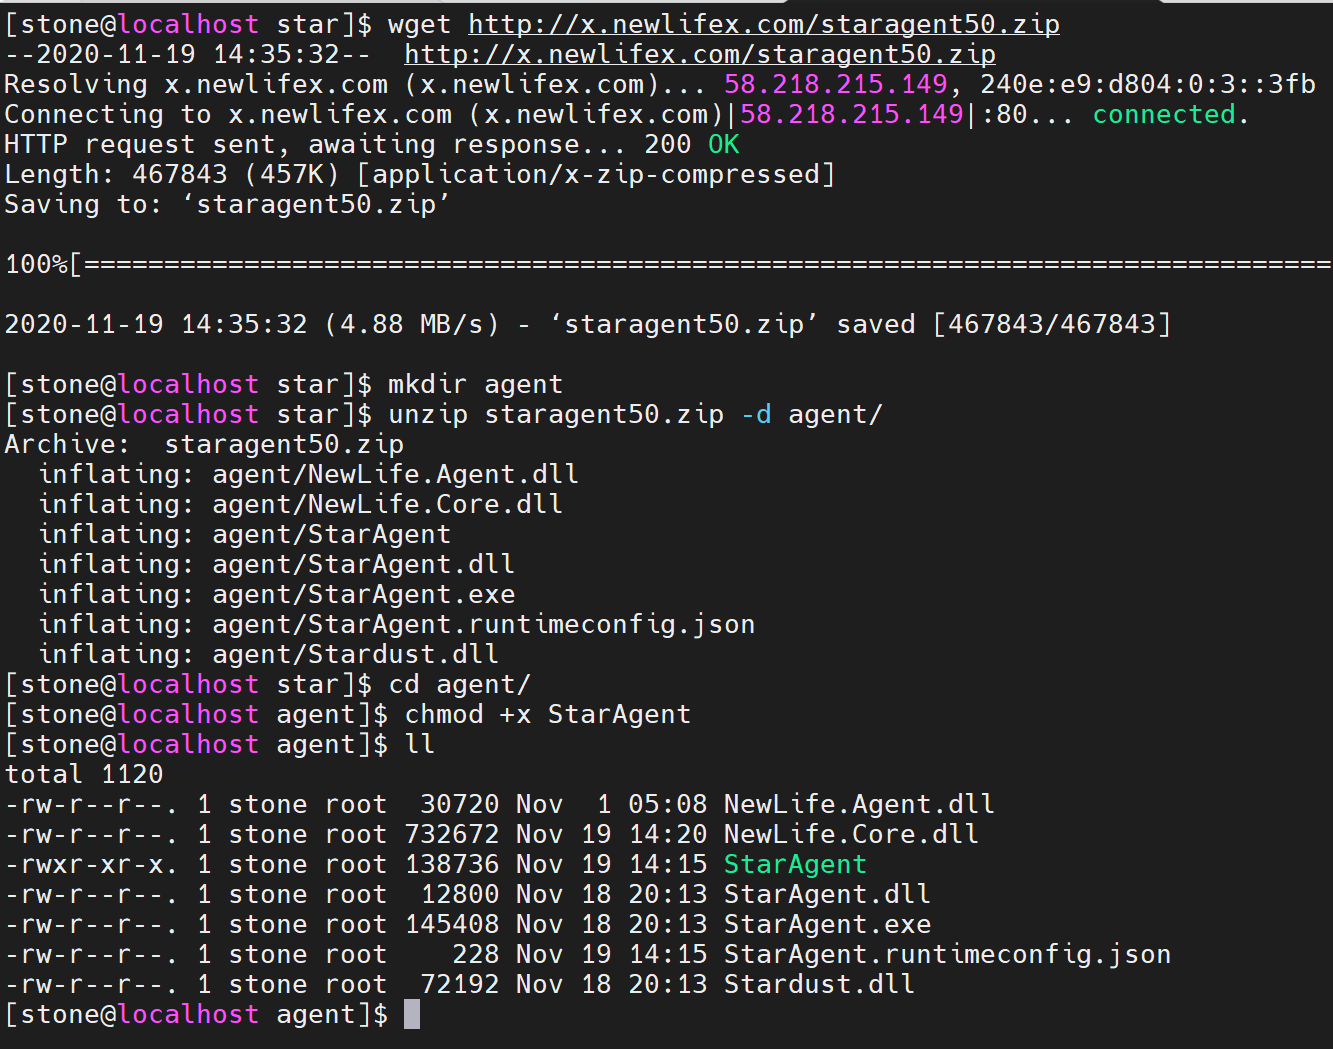
此时,可以运行 ./StarAgent 跑起来。某些版本没有StarAgent文件,可用以下命令启动:
dotnet StarAgent.dll按键s,设置星尘服务端地址为 http://star.newlifex.com:6600,使用者在这里输入自己部署的星尘服务端StarServer地址,默认是6600端口。
设置完成后按0退出。
此时,StarAgent的启动有两种方式:
1,直接nohup启动
nohup ./StarAgent -run &
或
nohup dotnet StarAgent.dll -run &
带上-run参数,直接以当前用户身份启动。
该方案简单易用,唯一缺点就是,服务器重启后,StarAgent不会自动启动。
2,安装为systemd守护进程
sudo ./StarAgent -install
或
sudo dotnet StarAgent.dll -install
后面加上-server参数即可在安装时指定服务端地址:
sudo ./StarAgent -install -server http://star.newlifex.com:6600
或
sudo dotnet StarAgent.dll -install -server http://star.newlifex.com:6600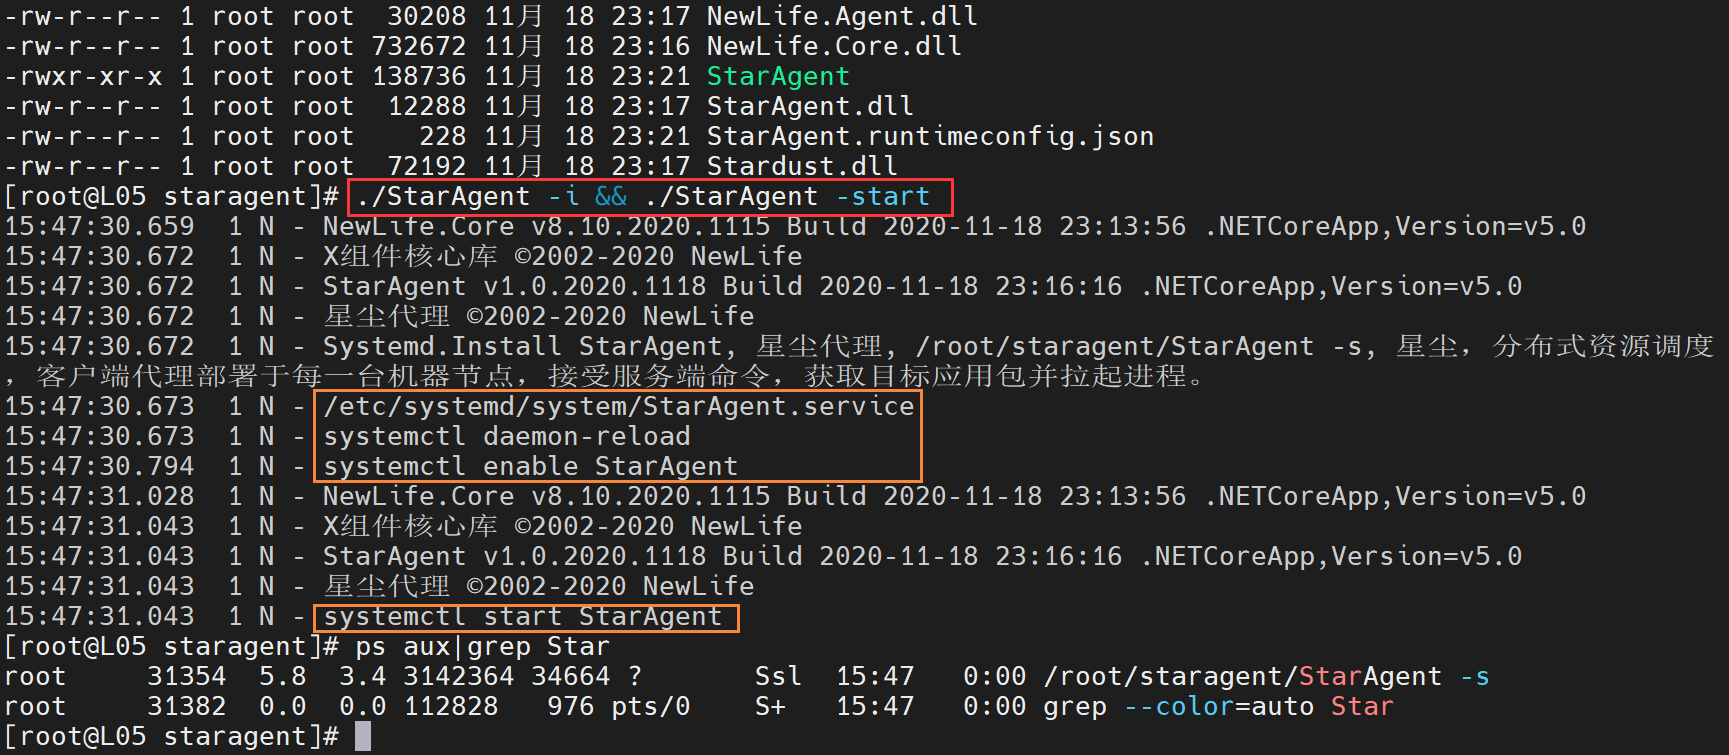
(20230713注:图片可能比较旧,文字会及时更新,可能会导致部分对应不上)
也可以像Windows那样,启动StarAgent后通过按键菜单来操作安装。
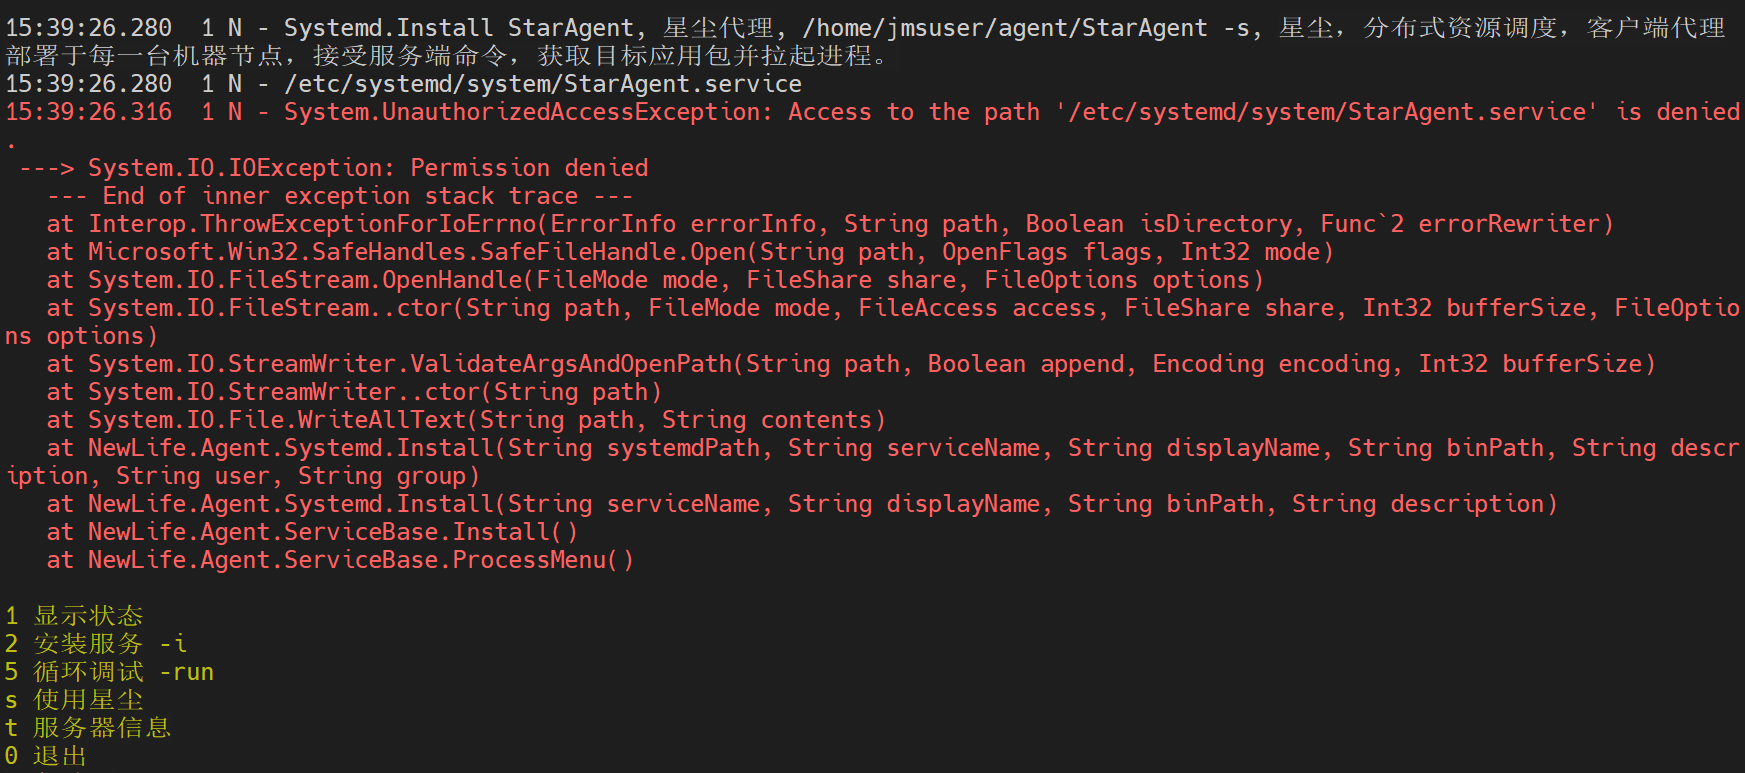
特别注意,必须要sudo权限才能安装为守护进程,否则报错
3,其它平台
得益于NewLife.Agent的支持,StarAgent在其它操作系统平台的支持如下:
- RcInit。在没有systemd的裁剪版Linux上,借助rc.d/init.d配置启动。例如A4工业计算机
- procd。OpenWRT系统借助procd配置启动。常见软路由使用OpenWRT系统
- OSXLaunch。macOS系统借助Launch配置启动。
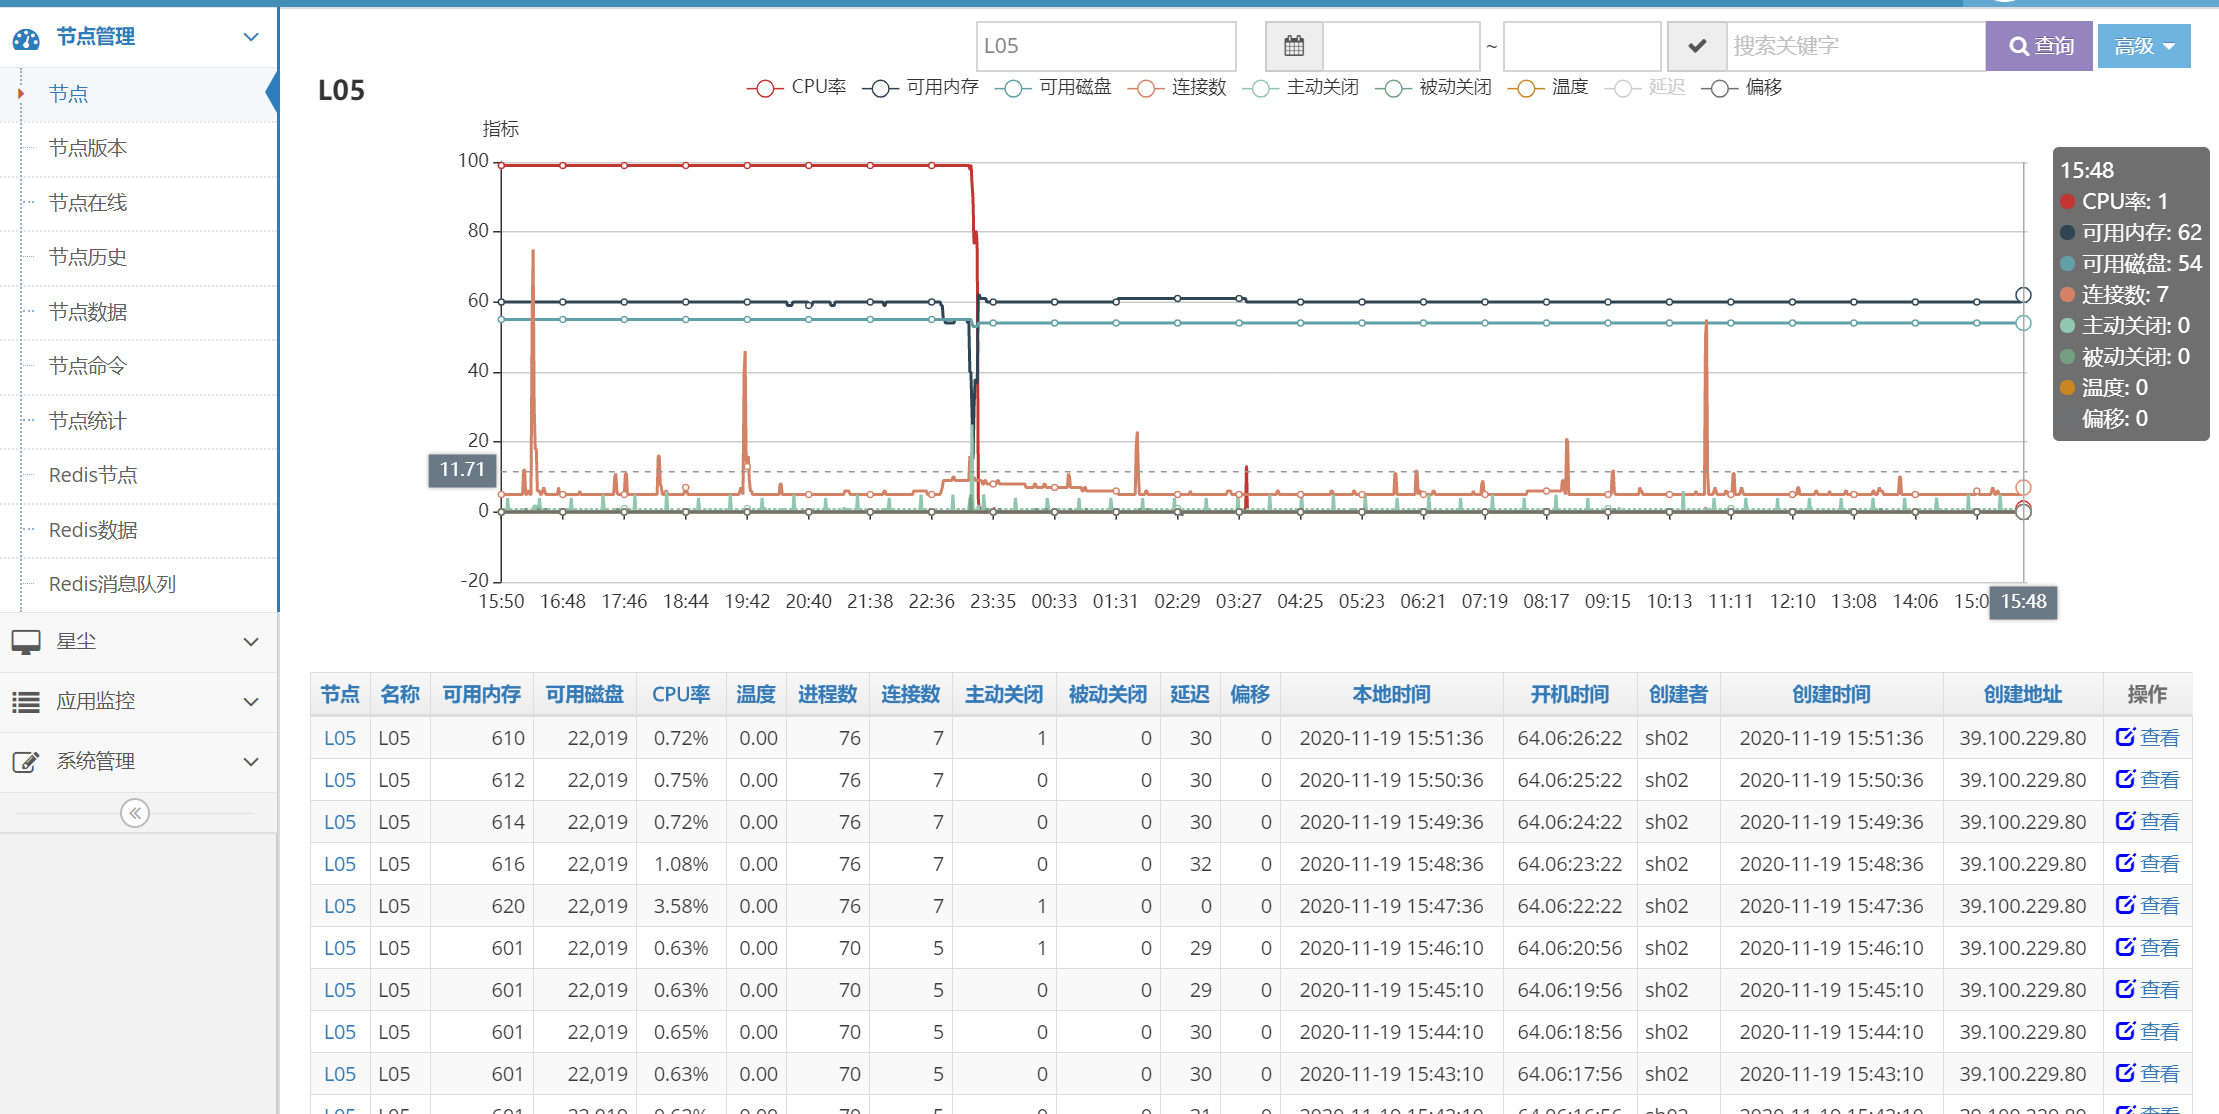
节点管理
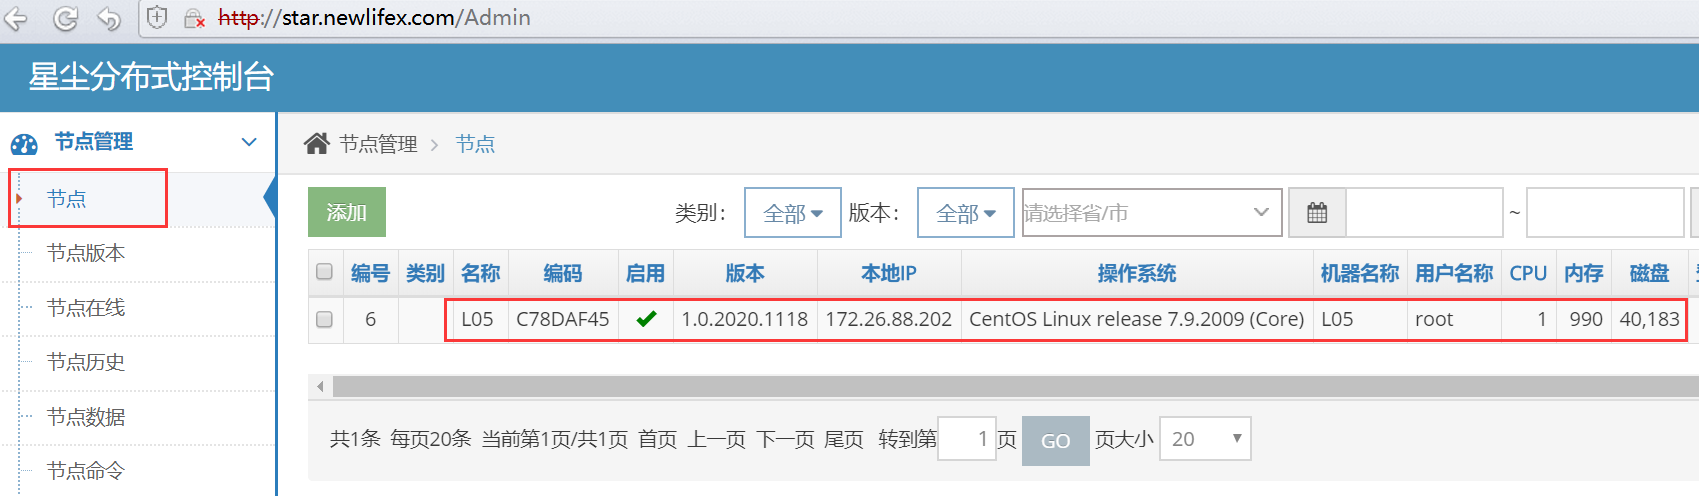
所有安装了StarAgent的服务器或桌面电脑,或IOT设备,统称星尘节点,定时(默认60s)向星尘服务端StarServer上报硬件信息和资源状态信息。
打开星尘控制台 http://star.newlifex.com 查看节点管理,即可看到。
点击数据链接,还可以查看该节点最近24小时的资源状态数据。